

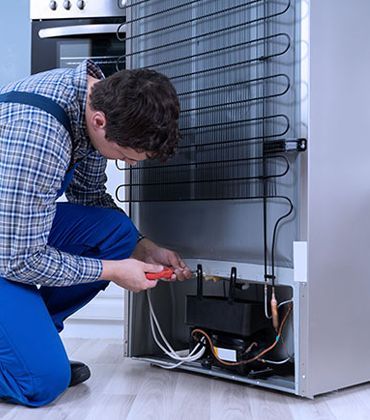
A refrigerator that won’t cool properly can quickly become a major household problem. Food spoilage, unpleasant odors, and wasted groceries are just a few of the issues that can arise when your fridge stops maintaining the correct temperature. Fortunately, not every cooling problem requires an expensive repair or immediate replacement. In many cases, the issue can be diagnosed and fixed with some basic troubleshooting.
This step-by-step guide will help you identify Refrigerator Repair in Orange County and common causes of refrigerator cooling problems and determine whether you can resolve the issue yourself or need professional assistance.
Signs Your Refrigerator Isn’t Cooling Properly
Before beginning any repairs, confirm that your refrigerator is actually experiencing a cooling problem.
Common signs include:
- Food spoiling faster than usual
- Refrigerator compartment feeling warm
- Freezer not freezing properly
- Excessive condensation inside the unit
- Strange noises coming from the appliance
- Ice cream becoming soft in the freezer
Ideally, a refrigerator should maintain a temperature of about 37°F (3°C), while the freezer should stay near 0°F (-18°C).
Safety First
Before inspecting or repairing your refrigerator:
- Unplug the appliance whenever working on electrical components.
- Wear gloves when handling sharp metal parts.
- Avoid using excessive force on plastic components.
- Keep water away from electrical connections.
Safety should always be your top priority.
Step 1: Check the Power Supply
Sometimes the solution is surprisingly simple.
Inspect the following:
- Power cord
- Electrical outlet
- Circuit breaker
- Power switch
Ensure the refrigerator is securely plugged in.
You can test the outlet by plugging in another appliance to verify that power is available.
If the outlet is not working, reset the breaker or contact an electrician.
Step 2: Verify Temperature Settings
Accidental temperature adjustments are more common than many homeowners realize.
Check the control panel and confirm:
- Refrigerator temperature is set correctly
- Freezer temperature is set correctly
- Vacation mode is not activated
Recommended settings:
- Refrigerator: 37°F (3°C)
- Freezer: 0°F (-18°C)
After adjusting settings, allow up to 24 hours for temperatures to stabilize.
Step 3: Inspect Air Vents
Cold air must circulate freely throughout the refrigerator.
Check that:
- Food packages are not blocking vents
- Shelves are not overcrowded
- Airflow pathways remain clear
Blocked vents can prevent cold air from reaching all sections of the refrigerator.
Rearranging items may immediately improve cooling performance.
Step 4: Clean the Condenser Coils
Dirty condenser coils are one of the most common causes of cooling issues.
Condenser coils release heat from the refrigeration system. When covered in dust and debris, they cannot function efficiently.
To clean them:
- Unplug the refrigerator.
- Locate the coils (usually behind or beneath the unit).
- Use a vacuum cleaner or coil brush to remove dust.
- Clean carefully without damaging the coils.
Cleaning coils every six months helps maintain efficient operation.
Step 5: Examine the Door Seals
Damaged door gaskets allow cold air to escape and warm air to enter.
Inspect the seals for:
- Cracks
- Tears
- Loose sections
- Dirt buildup
To test the seal:
- Close the door on a piece of paper.
- Try pulling the paper out.
- If it slides out easily, the seal may need replacement.
Clean dirty gaskets with warm water and mild soap.
Replace severely damaged seals.
Step 6: Check the Evaporator Fan
The evaporator fan circulates cold air throughout the refrigerator.
Signs of a faulty fan include:
- Warm refrigerator compartment
- Weak airflow
- Unusual noises
To inspect:
- Open the freezer section.
- Listen for fan operation.
- Press the door switch if necessary.
If the fan does not run or makes grinding sounds, it may require replacement.
Step 7: Inspect the Condenser Fan
Many refrigerators use a condenser fan to cool the compressor and condenser coils.
Check for:
- Obstructions
- Dust buildup
- Damaged blades
Spin the fan manually when the refrigerator is unplugged.
It should move freely.
A malfunctioning condenser fan can significantly reduce cooling efficiency.
Step 8: Look for Frost Buildup
Excessive frost accumulation may indicate a defrost system problem.
Common symptoms include:
- Reduced airflow
- Warm refrigerator compartment
- Ice-covered freezer walls
If you notice heavy frost:
- Unplug the refrigerator.
- Allow ice to melt completely.
- Dry the interior thoroughly.
- Restart the unit.
If frost returns quickly, components within the defrost system may require repair.
Step 9: Inspect the Defrost System
Modern refrigerators use automatic defrost systems to prevent excessive ice buildup.
The system typically includes:
- Defrost heater
- Defrost thermostat
- Control board or timer
When one of these components fails, frost can accumulate and block airflow.
Diagnosing these parts may require a multimeter and basic electrical knowledge.
Step 10: Check the Compressor
The compressor is the heart of the refrigeration system.
Signs of compressor problems include:
- Clicking noises
- Humming without cooling
- Complete lack of cooling
Place your hand near the compressor.
It should feel slightly warm and vibrate gently while running